Home / Hydroponics Made Simple

Hydroponics Made Simple

Filter by tag:

Demystifying TDS, EC, and PPM for Hydroponic Growth
Demystifying TDS, EC, and PPM for Hydroponic Growth
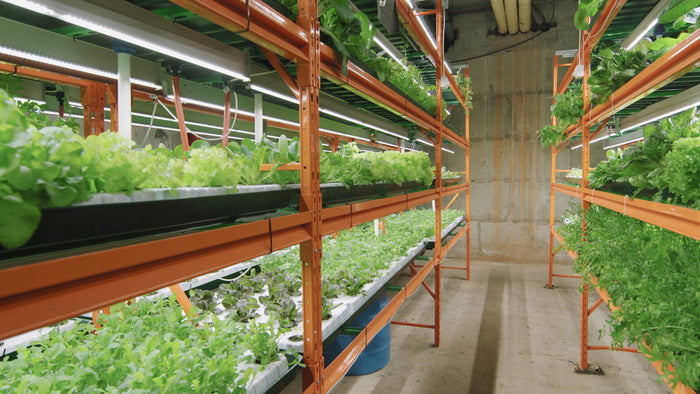
Text on a photo of a hydroponics system, filled with lettuce, that says: "Simply Explained" with an arrow pointing to "TDS" "EC" and "PPM"

Hydroponics offers an efficient and controlled method of cultivating plants, and to succeed, it's essential to understand the science behind it. One of the most critical aspects of hydroponics is monitoring the nutrient content in your water solution. This is where terms like TDS, EC, and PPM come into play. In this post, we'll simplify these acronyms and explain their significance in hydroponic plant growth.

Understanding TDS, EC, and PPM

TDS stands for "Total Dissolved Solids," EC stands for "Electrical Conductivity," and PPM stands for "Parts Per Million." These terms might seem confusing, but let's break them down:

  • TDS (Total Dissolved Solids): TDS measures the concentration of dissolved substances in your water. It's important to note that TDS probes don't directly measure the nutrient content in water. Instead, they estimate dissolved solids by assessing the water's electrical conductivity.
  • EC (Electrical Conductivity): EC and TDS are essentially two ways to express the same measurement. EC is commonly used in Europe and is typically measured in microsiemens per centimeter (μS/cm). It indicates how well the water conducts electricity. Pure water has low electrical conductivity, while nutrient-rich water has high electrical conductivity.
  • PPM (Parts Per Million): PPM is the measurement used in North America and is a way of expressing TDS. It quantifies the number of parts of dissolved solids per million parts of the solution. For instance, if your PPM reading is 800, it means you have 800 milligrams of dissolved substances in a liter of the solution itself.

Conversion Methods

To put it bluntly, North America is overcomplicating EC by converting it to TDS. Though, if forced to use TDS, it's important to understand that there are several methods get your final value. It's crucial to know which conversion method your probe employs, as different methods can yield different values. The most common conversion methods include:

  • Sodium Chloride (NaCl) Method: This method multiplies EC by 0.5.
  • 4.4.2 Method: This method multiplies EC by 0.7.
  • Potassium Chloride (KCl) Method: This method multiplies EC by 0.55.
Each conversion method is suited to specific situations, so it's important to use the right one for accurate results.

Applying TDS, EC, and PPM to Plant Growth


Different plants have varying nutrient requirements. Thicker vegetables, like bok choy, broccoli, and brussel sprouts, thrive with higher TDS values, while thinner plants, like various lettuce varieties, prefer lower TDS values. You can find most specific nutrient requirements for common plants online. Take a look at these to ensure your hydroponic setup meets the needs of your plants.

Choosing the Right Tools

To measure EC and TDS effectively, consider using a quality conductivity probe, such as the one found in the KAI Hydroponics Kit or the KAI Soil Kit. These kits use the sodium chloride (NaCl) method for converting EC to TDS, providing you with accurate readings.

Conclusion

While these acronyms might seem complex at first, understanding TDS, EC, and PPM is fundamental to successful hydroponic plant growth. It allows you to tailor your nutrient solution to meet the specific needs of your crops. We hope this post has provided a clearer understanding of these concepts and their application in hydroponic gardening. Happy growing!

(P.S. if you would prefer to watch a video explanation of these terms, you can click this sentence for one.)

A Simple Guide to Starting Seeds for Hydroponics

A Simple Guide to Starting Seeds for Hydroponics

Starting seeds for hydroponics can seem like a daunting task, especially if you're new to the world of indoor gardening. Many videos and guides tend to overcomplicate the process, making it appear more challenging than it needs to be. In this blog post, we'll break down the steps and equipment required to start your hydroponic seeds successfully. We'll keep it straightforward and easy to follow, so you can get started with confidence.

40 seeds that have sprouted up from growing pods, inside of a seed tray.

What You'll Need:

Before we dive into the process, let's gather the essential items you'll need to successfully start seeds for a hydroponics system. 
  1. Enclosed Space with Humidity Control: You'll need a controlled environment where you can increase humidity levels. These enclosed spaces are readily available at garden centers.
  2. Growing Medium: Options include seed starting mix, starter pucks, growing pods, coco coir, vermiculite, and rock wool. In this guide, we'll be using growing pods.
  3. Grow Light: Ensure your seedlings receive adequate light for healthy growth.
  4. Tweezers or Pencil: Tweezers are helpful for handling tiny seeds, while a pencil can be used to create holes for seed placement.
  5. Seeds: Choose the seeds of the plants you want to grow hydroponically.
  6. Spray Bottle: You'll need this to dampen the growing pods, maintaining a moist, but not overly wet, environment.
  7. Optional Heat Mat: While not mandatory, a heat mat can accelerate the germination process.

The Seed Starting Process:

Now that we have all the necessary tools and materials, let's walk through the step-by-step process of starting seeds for hydroponics:
  1. Prepare Your Growing Medium: If you're using growing pods like we are in this guide, they come ready for use. Make sure they are moist, but not dripping with water.
  2. Place Seeds in Growing Medium: Use tweezers (or your fingers if the seeds are large enough) to place your seeds into the growing medium. Remember that not all seeds will germinate, so it's okay to place multiple seeds in each pod, especially for leafy greens. 
    Caution: If you are growing thicker plants, like bok choy for example, you may want to take your chances with only one seed per pod. This is because it can be very difficult to untangle these plants if multiple seeds sprout. 
  3. Maintain Temperature and Light: If you have a heat mat, you can keep it running 24/7 to help with germination. Your grow light should be set on a timer for 12-18 hours of light per day. Alternatively, you can manage the light manually or use a smart controller for precise control.
  4. Monitor Environmental Conditions: Keep an eye on the temperature and humidity levels. Consider using a smart controller or sensor to get accurate readings. If humidity is low, you can add a bit of water to the base of the tray, but be cautious not to overwater.
  5. Watch for Mold: As your seeds germinate and grow, be vigilant for any signs of mold. If you notice mold, take action promptly to prevent it from spreading.

Conclusion:

Starting seeds for hydroponics doesn't have to be complicated. With the right equipment and a straightforward approach, you can set up your indoor garden with ease. By following these steps and monitoring your seedlings' progress, you'll be well on your way to growing healthy hydroponic plants. If you found this guide helpful, please consider leaving feedback and sharing it with others who are interested in hydroponic gardening. Happy growing!

(P.S. if you would prefer to watch a video of the steps outlined in this page, you can click on this sentence.)

Several different types of plants growing in a hydroponic raft. Specifically, leafy greens like lettuce and wasabi arugula.